Whether you’re a nail consultant or run a local nail salon, what will keep your business going is customer retention.
Getting that one customer to visit your nail salon instead of your competitor’s.
Getting that one customer to buy your latest nail wraps again and again.
Getting that one customer to refer their friends to your business.
And in today’s age where the smartphone dominates the lives of everyone, you know that you need a digital presence.
But who says you have to be tech savvy to go digital? (Hint: you don’t!)
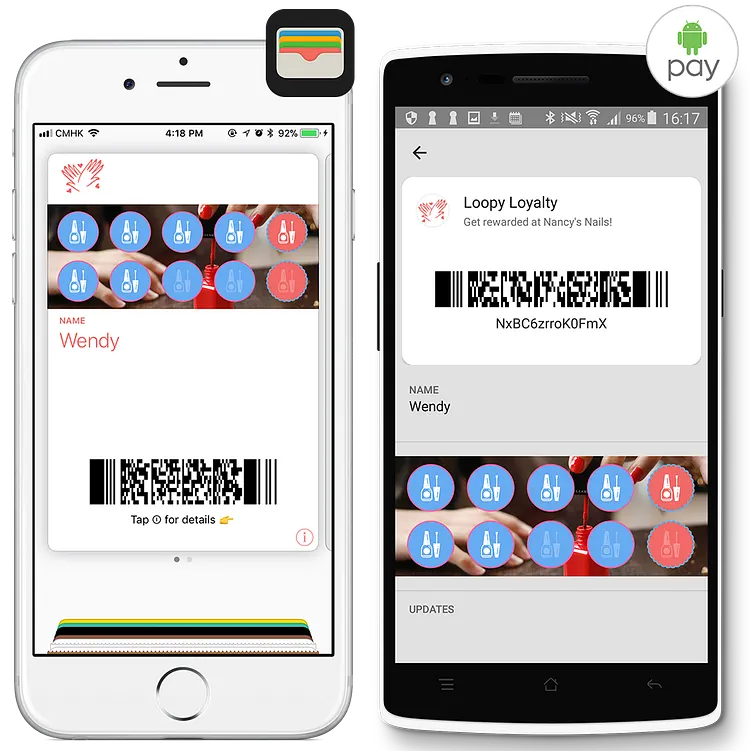
This post will show you how to easily create digital loyalty cards that your customers easily save to their native wallet application: Apple Wallet & Google Pay. Without having to install a 3rd party app.
Like these:
Once your digital loyalty cards are created, you’ll be able to:
- Get to know your customers like never before.
- Send targeted messages to your nail salon customers any time you want.
- Notify your privileged members of upcoming specials and treatments.
- Track the ROI of your nail salon loyalty program.
Ready?
Step 1 — Design your Nail Salon Loyalty Card
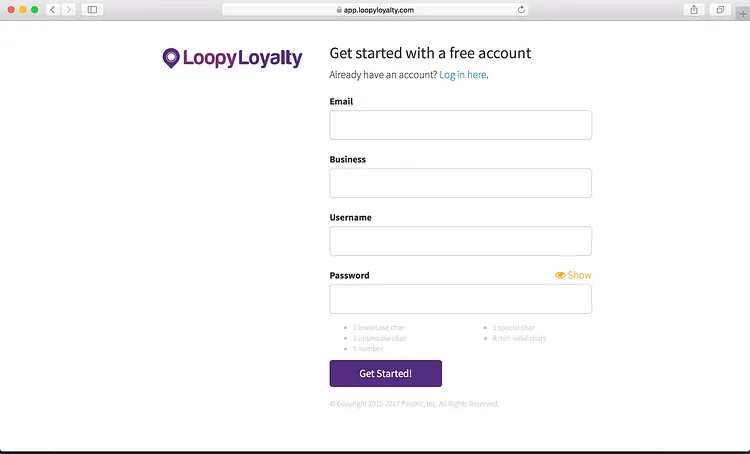
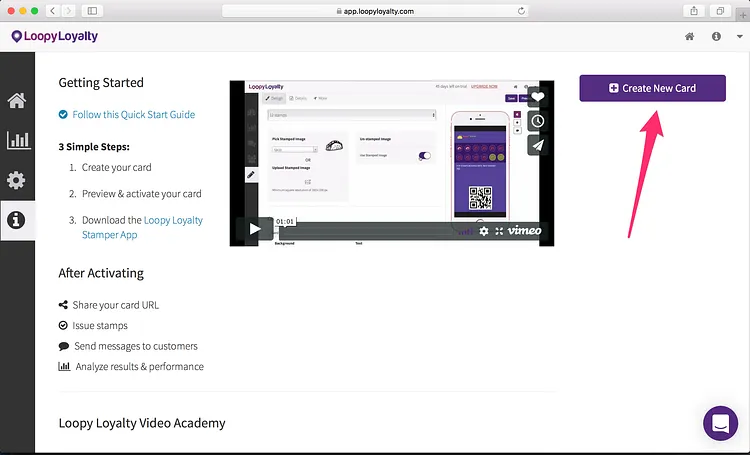
1 — Create a Loopy Loyalty account and log in. Setup only takes 1 minute.
2 — Create a new loyalty card design by clicking on the button or in the dropdown menu.
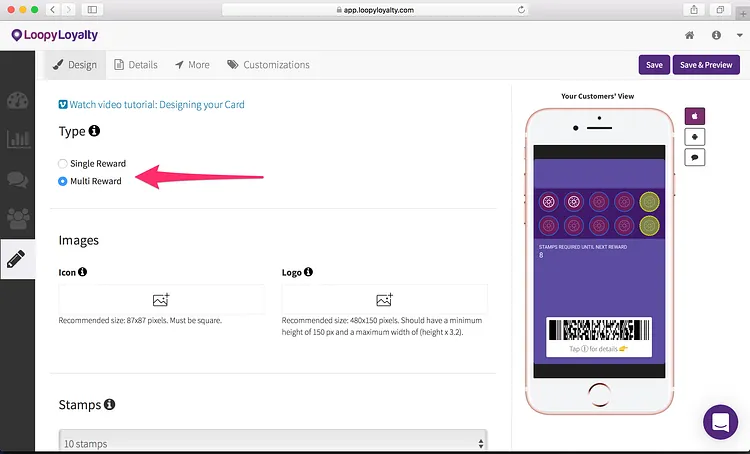
3 — Choose the digital loyalty card type that works best for your nail salon:
- Single reward: 1 reward after collecting all stamps/punches.
- Multi reward: multiple rewards at different points on the loyalty card.
Single reward digital loyalty card examples:
- Buy 10 manicures or pedicures and get 1 free.
- Spend $25 to get 1 stamp. Collect all stamps to get a free manicure & pedicure.
Multi reward digital loyalty card examples:
- Collect 4 stamps and get 10% off, collect 8 stamps and get 1 free manicure.
- Collect 3 stamps and get 20% off, collect 6 stamps and get 1 free hand massage, collect 9 stamps and get 1 free gel manicure or pedicure.
4 — Upload your logo (2 images). You can see where these images will appear on the right hand side. (Don’t worry, you’ll adjust colors in just a second).
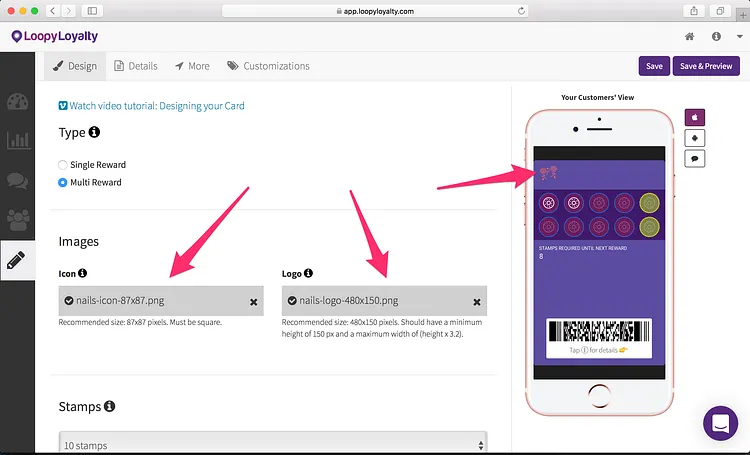
- Icon image — we recommend using an image that is 87 x 87 pixels. This image will appear on the lock screen.
- Logo image — we recommend using an image that is 480 x 150 pixels. This will appear on the front of your digital loyalty card.
Here are some pointers on uploading your icon and logo image.
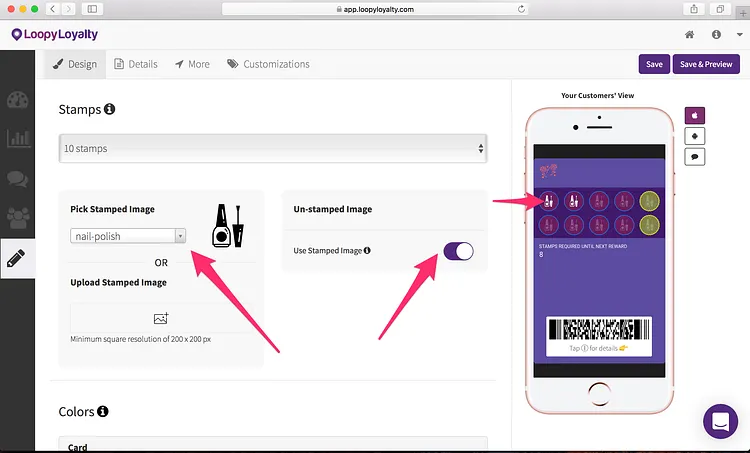
5 — Choose the number of stamps you want on your digital loyalty card. You can choose up to 30 stamps.
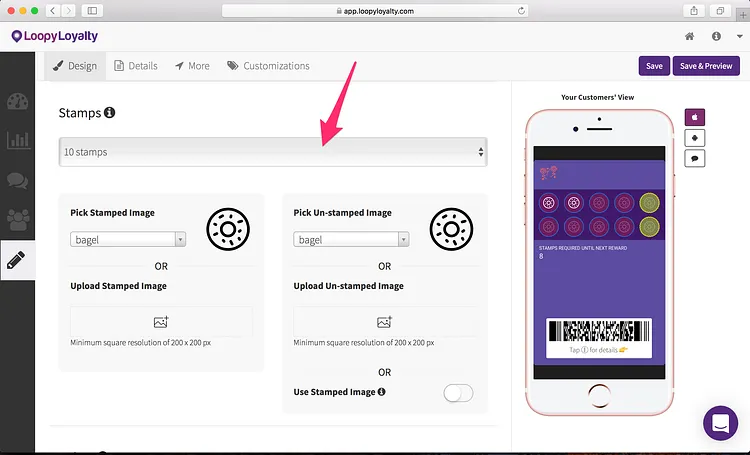
6 — Select your stamp and unstamped images from the gallery or upload your own. You can preview how this looks on the right hand side.
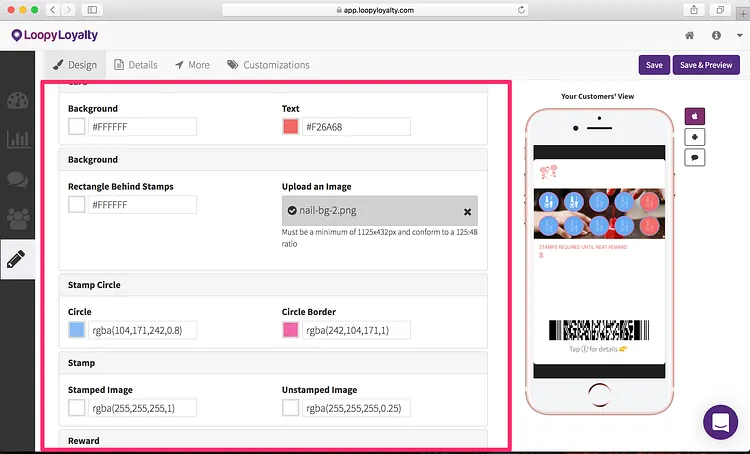
7 — Jazz up your digital loyalty card with colors. Bring your digital loyalty card to life by adjusting the colors of your card, stamps, and circles behind the stamps.
You can even add a custom image behind the stamps like the one shown below. Follow these instructions for how to do so.
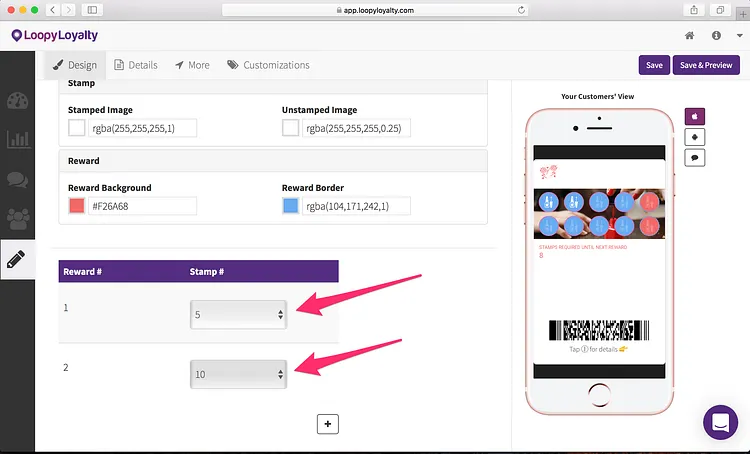
8 — If you chose a multi reward digital stamp card, you can choose which points you want to give rewards. In this case, a reward will be given at stamp 5 and stamp 10.
Step 2 — Your Digital Loyalty Program Details
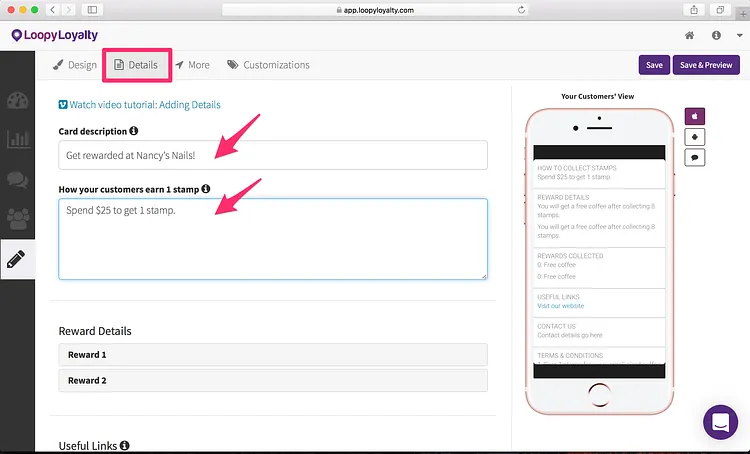
1 — Click on the ‘Details’ tab.
Add in your digital loyalty program description. For example “Get rewarded at Nancy’s Nails!” or “Your Digital Loyalty Card” or “Collect stamps for cool rewards!”. This will appear on the back of your card in Apple Wallet and on your digital loyalty program enrollment page.
Then describe what your customers need to do to earn 1 stamp. For example “Spend $25 to get 1 stamp” or “Get 1 stamp for every manicure or pedicure you purchase”.
2 — Define what your reward(s) are.
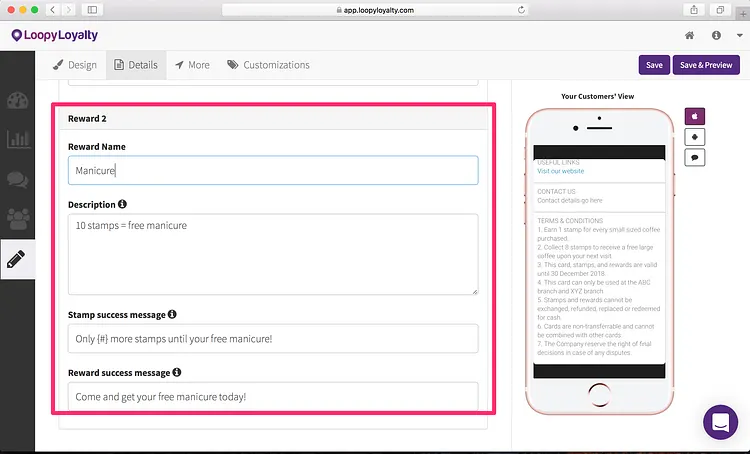
- Enter the name of your reward (e.g. “Manicure”).
- Enter the description of the reward (e.g. “10 stamps = free manicure”).
- Stamp success message: the message customers will receive every time they earn a stamp. “{#} more stamps until your free manicure!”. Important: use the {#} as the placeholder. The {#} will be replaced by the actual number of stamps.
- Reward success message: the message customers will see when they’ve earned a reward. “Come and get your free manicure today!”
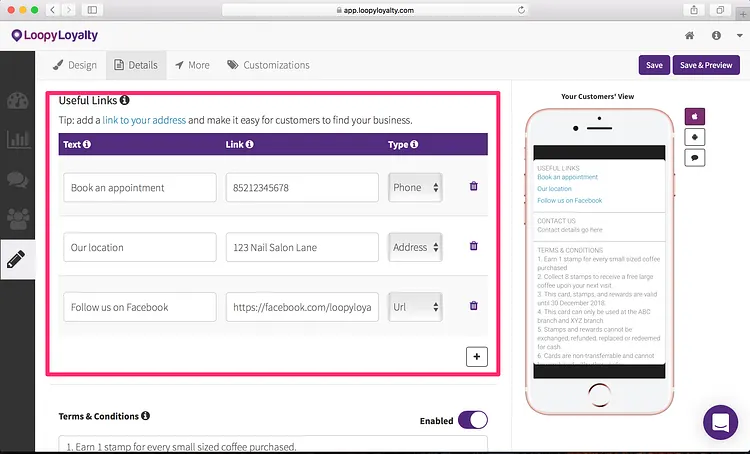
3 — Add links to your digital loyalty card: phone number for booking, your address, your Facebook page, and more.
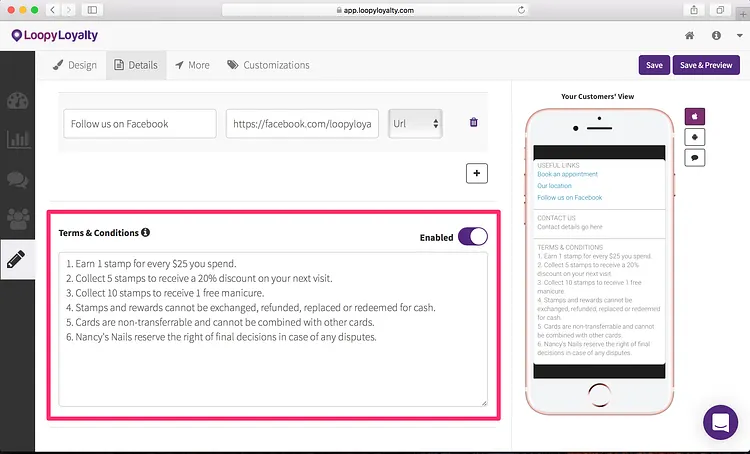
4 — Add in the terms and conditions for your digital loyalty program. We’ve provided some sample terms and conditions for you — simply swap out text where appropriate.
If you don’t want to have any terms & conditions, you can disable it.
Step 3 — Expiry, Data Collection, and Location Based Messages
1 — Click on the ‘More’ tab at the top.
Choose an expiry option for your digital loyalty card. For example:
- Cards will never expire
- Cards will expire on 31 December 2018
- Cards will expire 1 year after a customer signs up for it
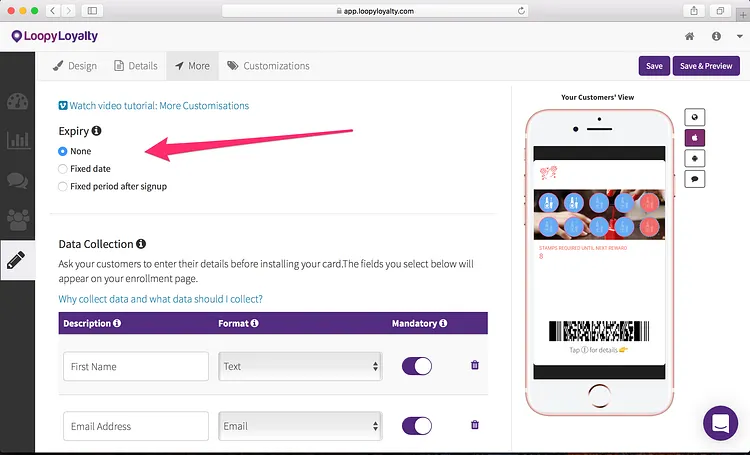
2 — Data collection: choose what info you want to collect from customers when they sign up for your digital loyalty card. This will appear on the enrollment form and all the information you collect will be stored in your ‘Customers’ page.
You can preview how your enrollment page looks like on the right hand side.
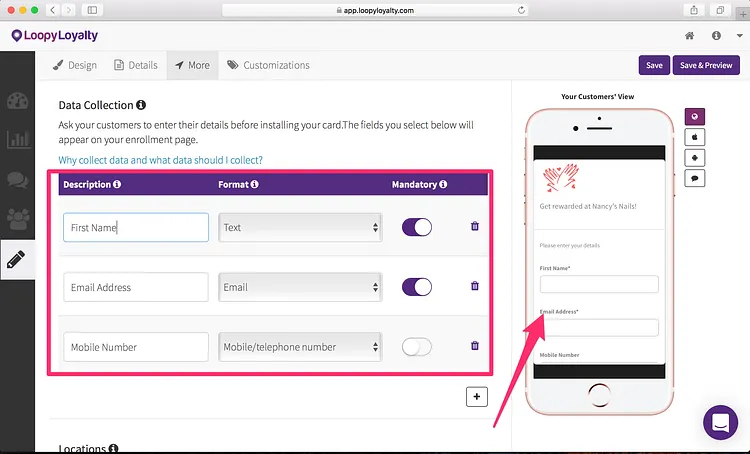
We’d recommend collecting the following information so that you can personalize your messages to them later on:
- Name
- Birthday (if you’d like to reward customers on their birthday)
Word of advice: don’t ask for too much information.
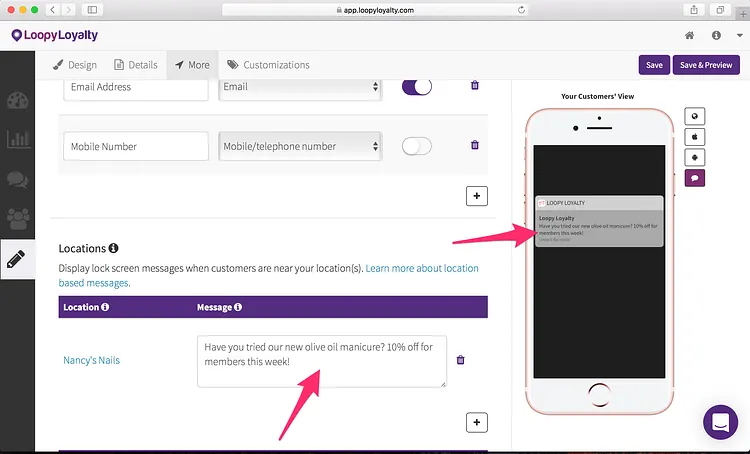
3 — Optional: trigger a message when your customers are near your nail salon. All you need to do is add in your location add in your location and type in the message you want to display when they are near your nail salon.
For example: “Welcome to Nancy’s Nails!” or “Have you tried our new olive oil manicure? 10% off for members this week!”
Learn more about how location based notifications work here.
Step 4 (Optional) — Premium Customizations
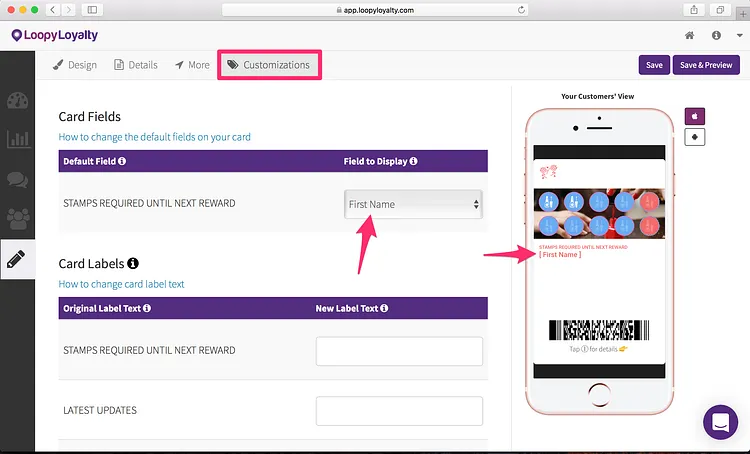
Card Fields
If you want to change the default field of “Stamps required until next reward” on your digital loyalty card, you can do so here. For example, you can display your customer’s name here instead. Learn more here.
Press enter or click to view image in full size
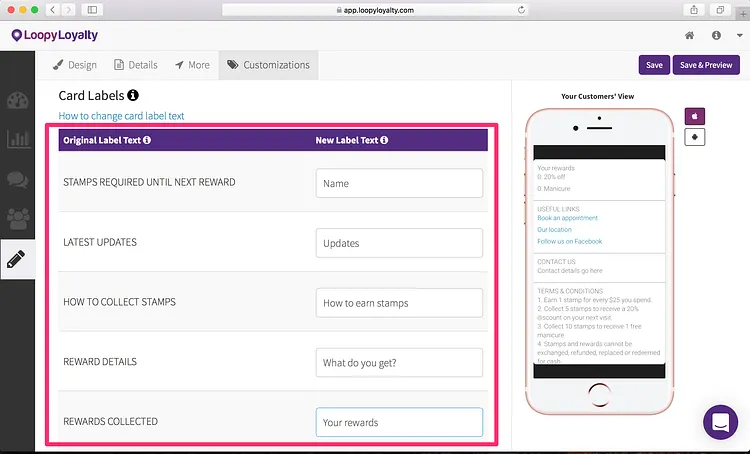
Card Labels
You can also change the default label text on your digital loyalty card. For example, change “LATEST UPDATES” to “Updates”. Learn more here.
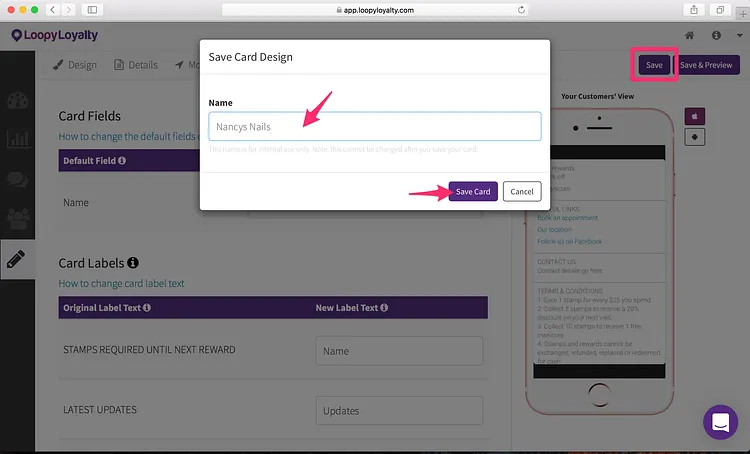
Step 5 — Save & Activate your Digital Loyalty Card
1 — Click on the ‘Save’ button in the top right and give your digital punch card a name. For example: “Nancys Nails”.
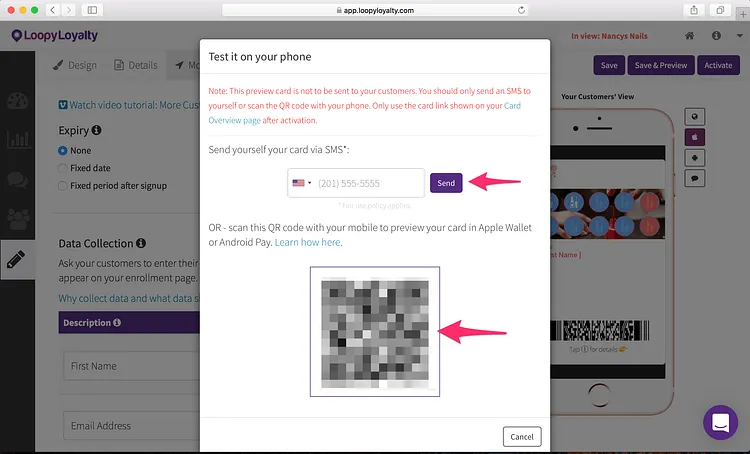
2 — Click on ‘Save & Preview’ to preview what your digital loyalty card looks like in Apple Wallet or Android Pay. You can scan the QR code or send an SMS of the card URL to your phone.
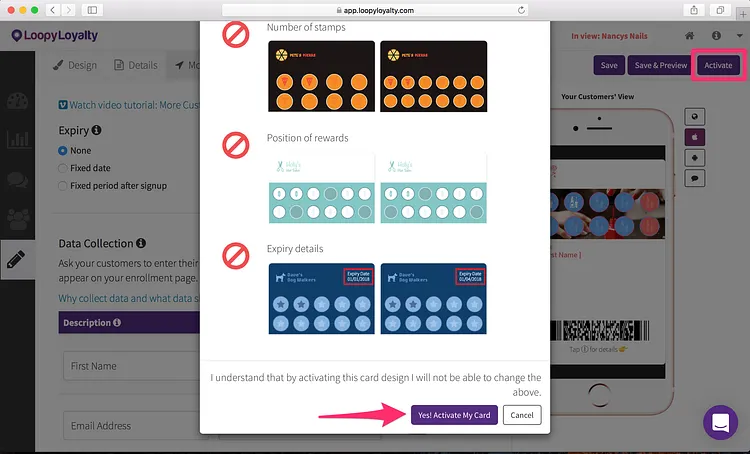
3 — When you’re happy with your digital loyalty card, click on ‘Activate’ in the top right. Here’s what you can’t change after you activate your card design.
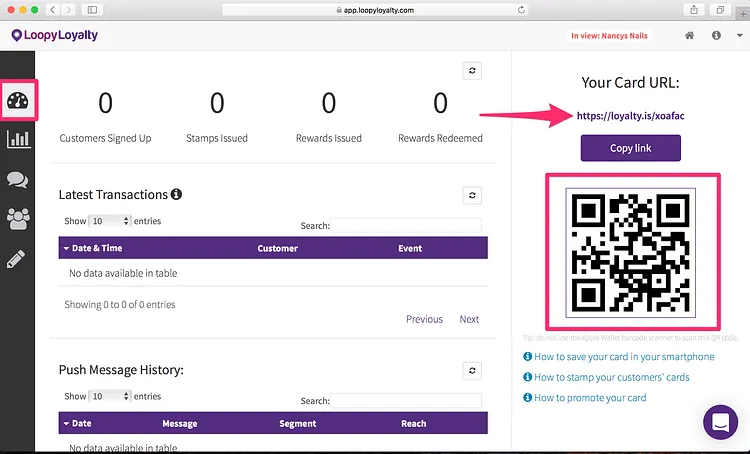
And presto, your digital loyalty card is now ready to send to customers!
Go to your Dashboard and share your digital loyalty card URL / QR code with your customers.
Here are some ways in which you can promote your digital loyalty program, including how to promote your digital loyalty program in your nail salon through tent cards.
Before going live, please also download the digital stamper app so that your staff can issue stamps to customers after they’ve visited your nail salon.
Pro tip: you can also issue stamps to customers through the web.
About Loopy Loyalty
Loopy Loyalty is the world’s only web application to create and manage digital stamp cards for Apple Wallet and Android Pay. Design your cards online, send push messages to customers, capture transaction history, and view detailed customer insights.
No tech knowledge needed. No app development required.
Learn more at https://loopyloyalty.com/.