Enrolling website visitors to your loyalty rewards program is a great way to grow your business and there are a variety of ways to promote your digital loyalty program on your website.
When you activate your digital loyalty card we provide you with a unique card URL and QR code which you can share with your customers. Both of these redirect your customer to a signup form which they have to complete before they can add your card to their smartphone.
But did you know that with a bit of coding trickery you can customize this signup form to match with your brand and embed it on your own website?
Here’s how this works.
First of all, you will need the card ID of your loyalty card, which you can find in the overview page of the card within your Loopy Loyalty account. Simply click on the card after signing in to your account and you will be taken to the overview.

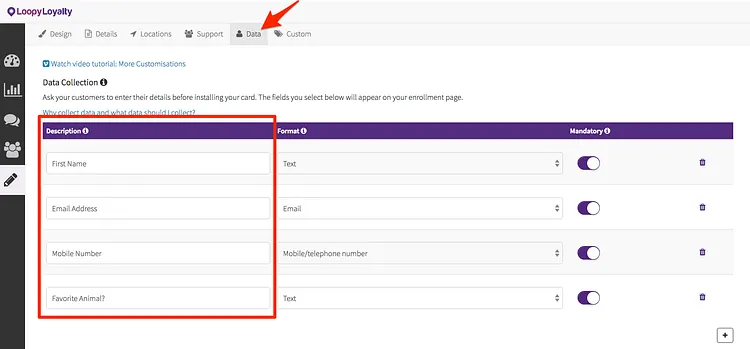
Start with building your form based on your card’s Data Fields. You can get the names of the Data Fields for your card by going into your card design and clicking the ‘Data’ tab:
You can now use these field names to make a custom HTML landing page to POST a JSON payload to the public enroll endpoint:
Endpoint
POST https://api.loopyloyalty.com/enrol/{cardId}
Sample Payload
Make sure to replace the field names in the customerData object with the Data Fields from your card design.
{
 "customerData": {
  "Name": "John Doe",
  "Contact Number": "+85212344567",
  "Birthday": "2018-05-29T16:00:00.000Z",
  "Email address": "john@doe.com"
 },
 "timeZoneOffset": -480,
 "dataConsentOptIn": true
}
Tips:
- in Loopy Loyalty we support the following Data Field types ( with their corresponding HTML5 input types): Text (input type: text), Number (input type: number), Date (input type: date), Email (input type: email), URL (input type: url), Mobile/telephone number (input type: tel).
- make sure to use the above HTML5 input types in your form, that way for most browsers, you can leverage the built in HTML5 form validation.
- timeZoneOffset can be used to set users timezone (this can be grabbed from the browser, or can always be fixed). timeZoneOffset is in minutes.
- date fields should be submitted in iso8601 date format.
Code Sample
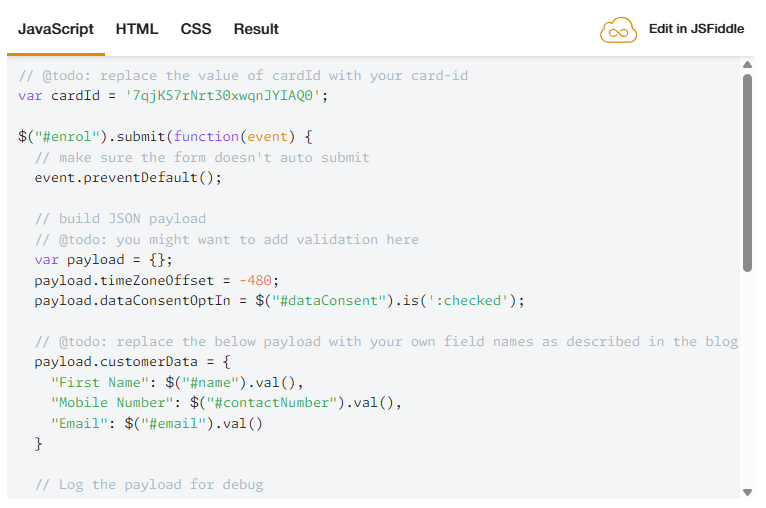
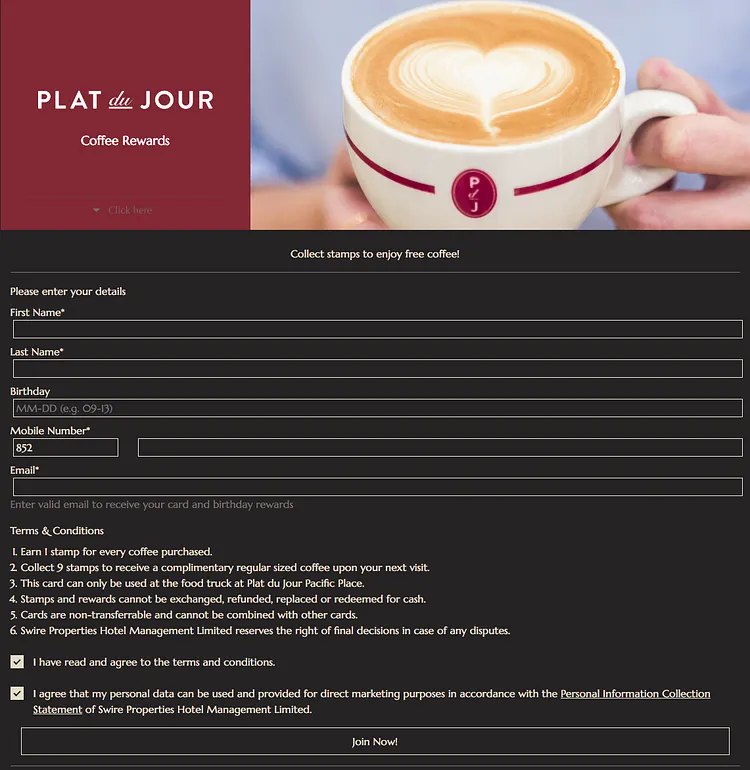
Implement HTML, CSS and Javascript and below result:
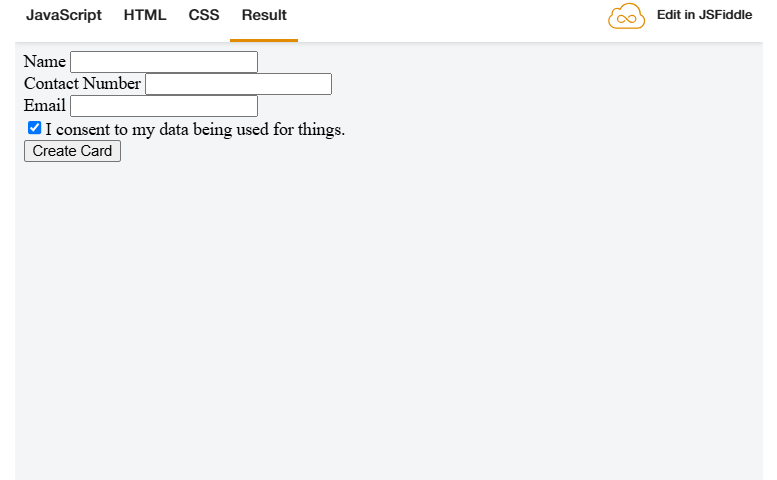
For a working code sample see the JSFiddle.
Last but not least you can use CSS to style the form any way you like and truly make it your own by changing the colours, fonts, positions.
A cool example of what’s possible with a bit of customization can be seen at https://rewards.swirerestaurants.com/