

This step by step guide teaches you how to add a digital loyalty card to Apple Wallet (formerly Apple Passbook).
Looking to replace all your paper stamp cards with digital loyalty cards conveniently stored in Apple Wallet?
Tell the business to head over to Loopy Loyalty and make it happen today.
Or tell us and we’ll get in touch with them!

Note: The images are for illustration purposes only. The actual Loyalty Card given to you will be a different colour, and have a different logo, text, QR code and URL on them. The process to follow, however, is exactly the same.
Method 1: For iOS11 users
Step 1: Launch the Camera app on your iPhone
You can launch the camera from your home screen or by swiping up to access your Control Center.
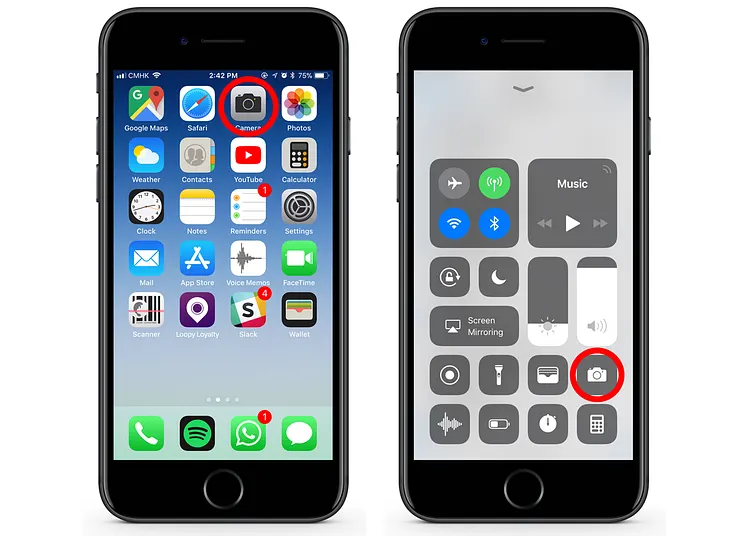
Step 2: Point it at the QR code you want to scan

Step 3: Look for the notification banner at the top of the screen
This is the data stored in the QR code.
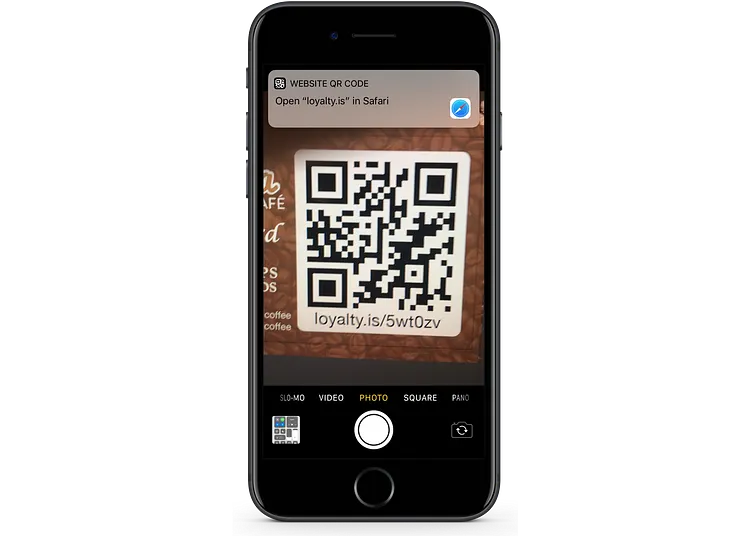
Step 4: Tap on the notification banner
Safari will automatically open.
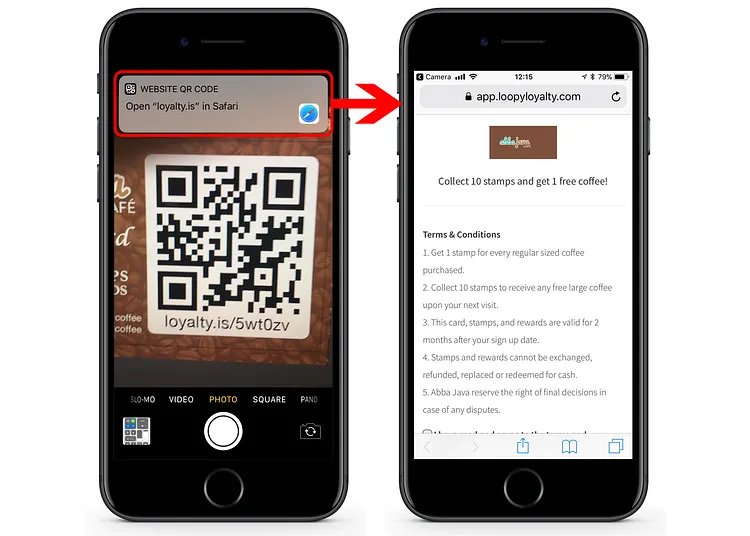
Step 5: Fill in the necessary details
And tick the box to agree to the terms and conditions (if appropriate).
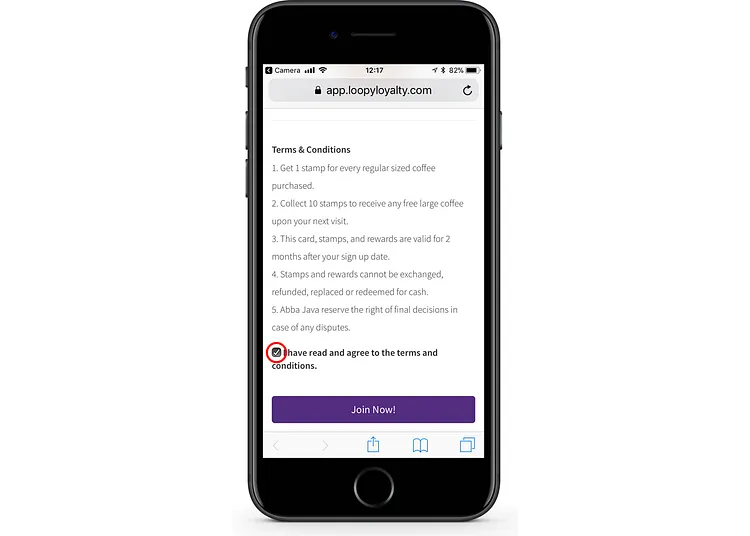
Step 6: Tap on the Join Now! button
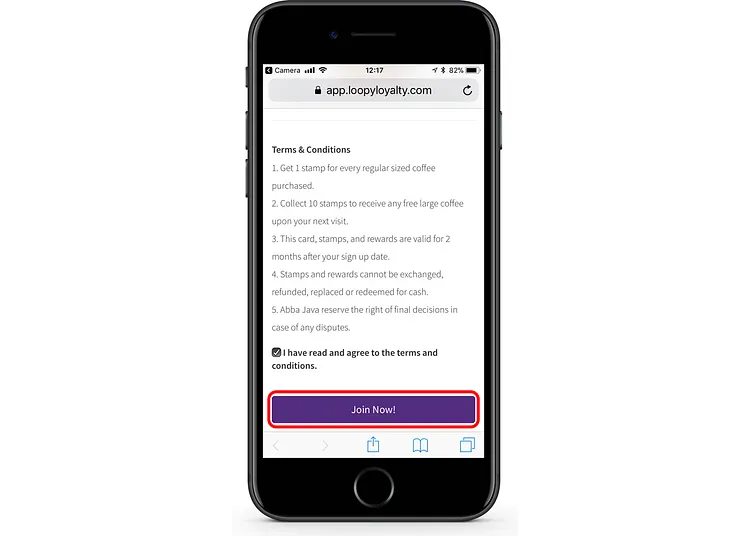
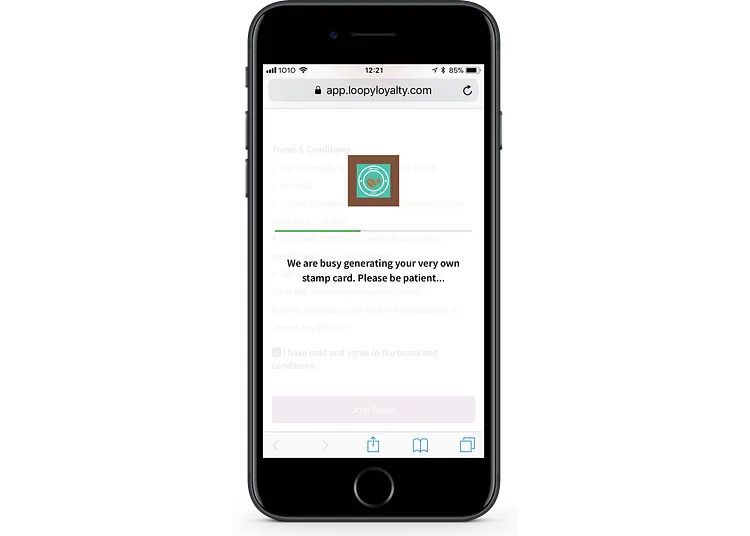
Step 7: Wait a few seconds
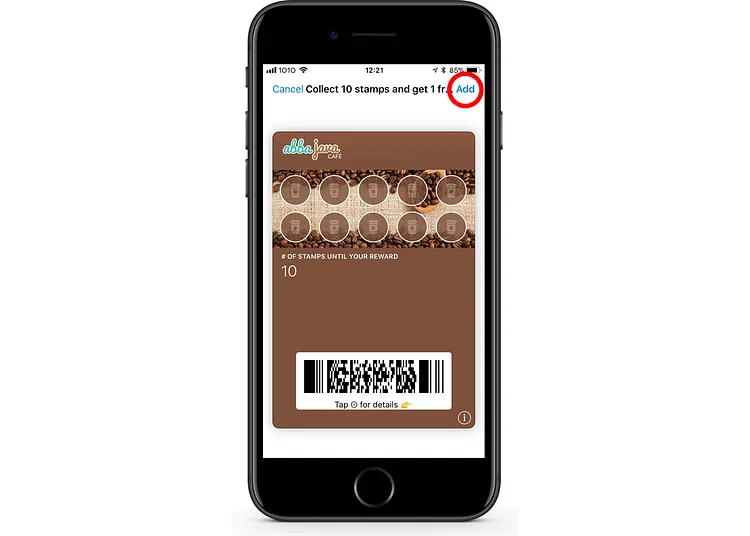
After a few seconds you will see your Loyalty Card.
Step 8: Tap Add at the top right corner of the screen
THIS IS VERY IMPORTANT! If you do not tap Add then the loyalty card will not be added to your Apple Wallet application.
Press enter or click to view image in full size
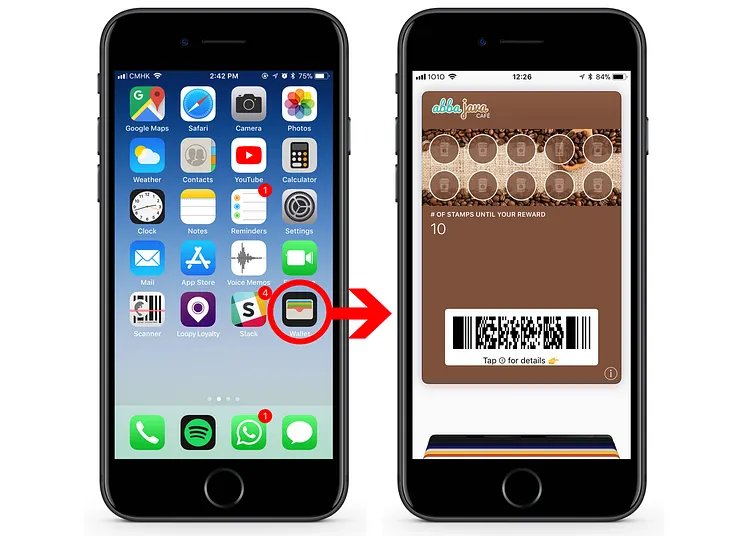
Step 9: Your Loyalty Card is now stored in Apple Wallet.
You can check to see your loyalty card is in Apple Wallet by opening the Apple Wallet application.
Method 2: For iOS10 (or lower) users
Step 1: Launch the Safari app on your iPhone
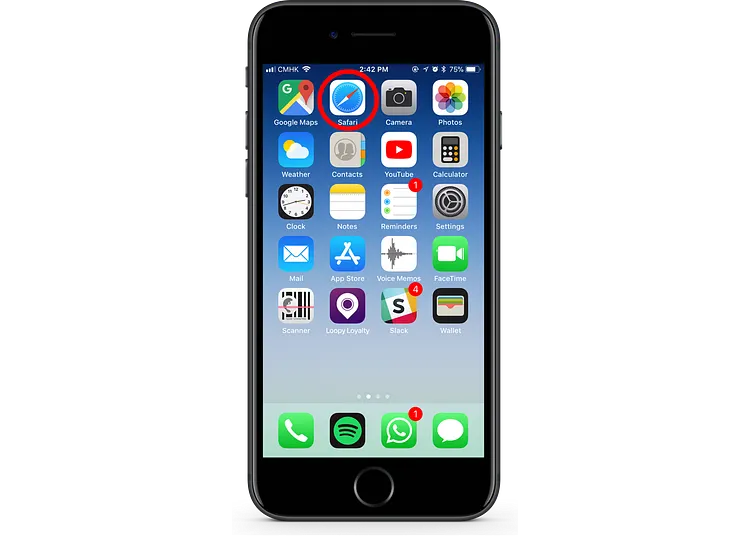
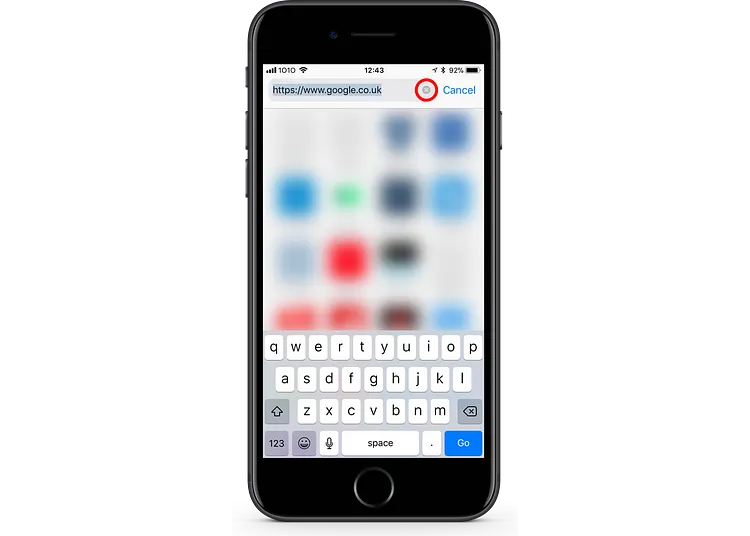
Step 2: Tap the Safari address bar and then tap the ‘x’ to the right
This will clear the content in the address bar.
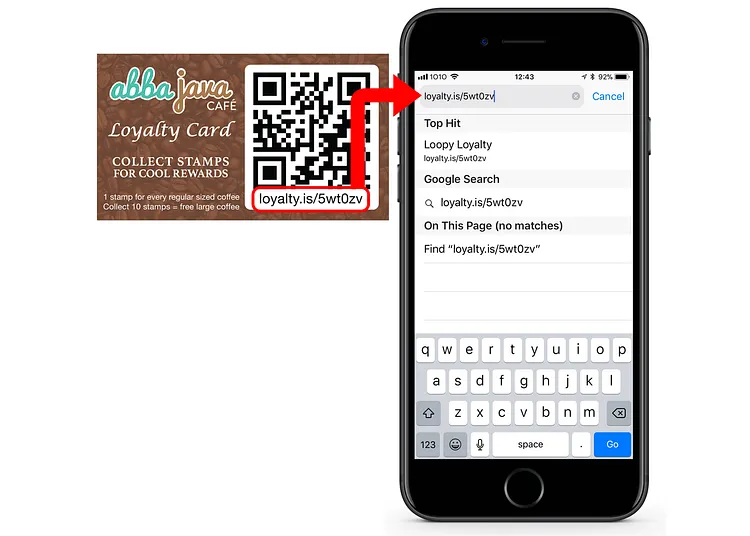
Step 3: Type the web address given to you.
The web address will start with loyalty.is/ followed by 6 characters. Make sure you type the address exactly the same as the link given to you. If a letter is upper case make sure you type it in upper case. If a letter is lower case make sure you type it in lower case.
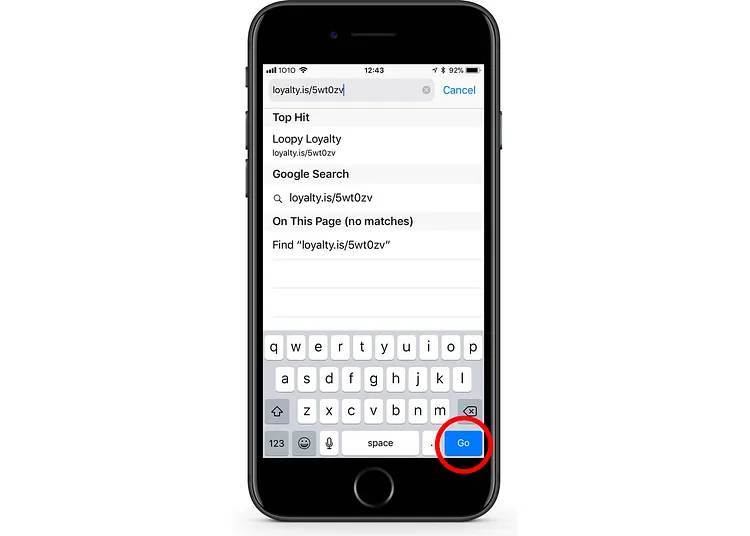
Step 4: Tap Go in the bottom right of your keyboard
Step 5+: Now follow Steps 5 to 9 for iOS11 users.
Tips
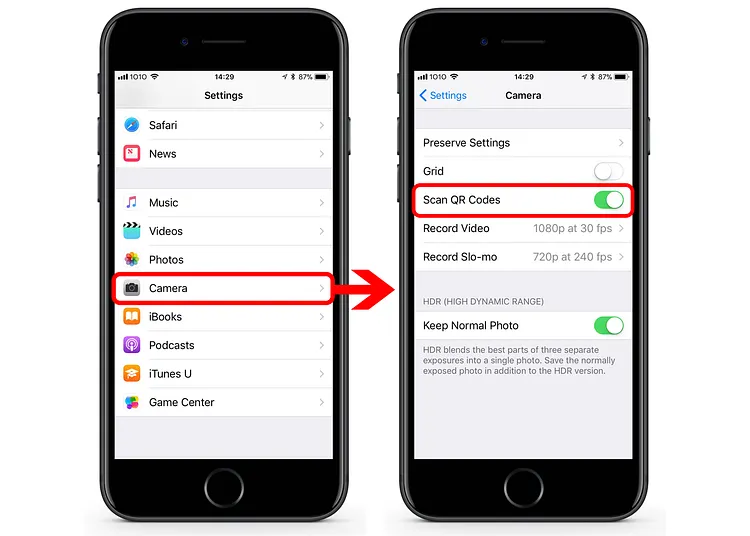
For iOS11 users, make sure that QR code scanning is enabled. You can do this in your settings app on your iPhone. In settings, scroll down and tap Camera and make sure that the toggle is green. i.e. Scan QR Codes is switched on.
iOS10 users can also scan the QR code (instead of typing the web address in Safari) but you will first need to download a QR code scanning app from iTunes.